Saturday, 14 May 2011
Wednesday, 11 May 2011
Tuesday, 10 May 2011
Slotta tabs

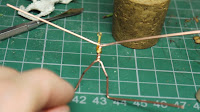
Usually its one of these devices used to make a tab.But below is another way that i use,
 Carefully bend inwards and snip the wires
 Mix up enough putty to do the job,i use more blue on the tabs
 Push the putty on from below nip and squeeze it together,cover the wires as best as possible,
 Deploy deluxe Nacho eating prong,these tweezers are used due to them being of smooth stainless steel with a more generous gap between the halves,
 Big Water to dunk the figure and the tweezers in,
 Very gently squeeze the wet putty with your wet tweezers to the desirable thickness,dont worrry about any excess putty spilling over,
 Leave to dry,
 Somewhere safe away from jumpers and the bottom of coffee cups,
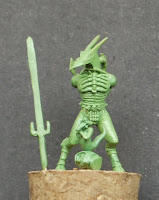
Use whatever sized slotta base its been designed for for the next step,these are desting for 25mm round.So i take a 25mm round base thats superglued onto a cork and first cut away the putty to the left and righ of the tab.Test fit into the base now and remove putty from the bottom of the tab until the feet rest perfectly on top of the base.Once you're happy with this very carefully trim away any excess putty that is still there between the feet.
Now you should have a nice strong tab for your figure the only thing thats left now is to date/copyright it and apply the miniatures name and off it goes.
Friday, 6 May 2011
Tuesday, 3 May 2011
Sunday, 17 April 2011
Thursday, 14 April 2011
Tuesday, 12 April 2011
Monday, 11 April 2011
Subscribe to:
Comments (Atom)


